Subscribe For Free Updates!

We'll not spam mate! We promise.

12 iPhone 6 Tricks That You Need to Know [Part 1]

How to Share Your Location With Friends

In iOS 8, you can now easily share your location with friends whilst you’re messaging them in. You just need to click on ‘details’ in the conversation thread in the top right-hand corner. Then select ‘send my location’ and your exact coordinates will be sent immediately.

You can also set to how long you want your location shared for; maybe an hour or within the day. Go to the same details menu, select the choice you want.


How to Respond a Text Without Leaving an App

Your notifications are now interactive, it only means that you don't have to leave an app you are using to reply to a text message.

You just need to pull the notification down from the top of the screen, and type your response in the small text box provided.


How to Check What's Draining Your Battery

Now you can monitor what apps are draining your battery most. You can see a full list of apps that you are using.

Go to General > Usage > Battery Usage 


How to Hide Photos / Pictures

Save yourself from embarrassment when some tries to access your phone and will watch your photos. A new feature in iPhone 6 that will hide your personal photos.

To hide your photos, simply long-press a photo and select the option to hide. The photo will then be hidden away from Collections, Moments and Years, but still visible in Albums.

But if you really want to avoid embarrassment, avoid taking photos that will embarrass you.


How to Use Do Not Disturb

If you don't want to be disturb, you can mute alerts for text messages from specific people by selecting the ‘do not disturb’ option in the details menu in a message. 

This means that if you’re expecting a number of texts from one person, you can avoid having your phone constantly go off.


How to Use Credit Card Scanner

To minimize your time in typing your credit card details when you’re buying something via Safari, you can scan your card instead with the iPhone’s camera. 

The option will automatically appear above the keyboard. Select it and hold your card in-front of the camera and it will capture the relevant information.

How to Use FaceTime in iPhone 6 iOS 8

Using the FaceTime application, you can make a video call to someone with a Mac or other iOS device that supports FaceTime. It will let you talk face-to-face using the FaceTime camera; switch to the iSight camera on the back to share what you see around you.

Note:  In iPhone 6, you can make FaceTime calls over a cellular data connection. Cellular data charges may apply.

To turn off FaceTime using cellular data, go to Settings > General > Cellular.

Make a FaceTime call:

In Contacts, choose a name, tap FaceTime, then tap the phone number or email address that the person uses for FaceTime. To call someone who has an iPhone 4 or later, you can start by making a voice call, then tap FaceTime.

Note:  With FaceTime, your phone number is displayed even if caller ID is blocked or turned off.

Use Siri or Voice Control:  

>>> Press and hold the Home button , then say “FaceTime,” followed by the name of the person to call.

Set FaceTime options:

>>> Go to Settings > FaceTime to:

- Turn FaceTime on or off
- Specify your Apple ID or an email address for receiving FaceTime calls

How to Secure iPhone 6 With Passcode Unlock

Securing your iPhone 6 is very important specially if you have files or private information that you don't want to be access by someone else.

For security purposes, you can set a passcode that you need to enter every time you want to use your iPhone 6.

Setting a passcode turns on data protection, which uses your passcode as the key for encrypting mail messages and attachments stored on iPhone. (Some apps available from the App Store may also use data protection.) A notice at the bottom of the Passcode Lock screen in Settings shows that data protection is enabled.

For more secure passcode, it is advisable to turn off Simple Passcode and use a longer passcode with a combination of numbers, letters, punctuation, and special characters.

To unlock iPhone when it’s protected by a combination passcode, you enter the passcode using the keyboard. If you prefer to unlock iPhone using the numeric keypad, you can set up a longer passcode using numbers only.

To prevent accessing to Siri when iPhone is locked:

Do this,

> Go to Settings > General > Passcode Lock, then turn Siri off.

To prevent voice dialing when iPhone is locked:

Do this,

> Go to Settings > General > Passcode Lock, then turn Voice Dial off.

(Available only when Siri is turned off in Settings > General > Siri.

How to Print on iPhone 6 / iPhone 6 Plus Using AirPrint

AirPrint gives you an easy way to deliver full quality photo document printing from your iOS and OS X apps. Some AirPrint features include include easy discovery, automatic media selection, and enterprise-class finishing options.

To use the AirPrint, just select an AirPrint printer on your local network to print from your favorite iOS or OS X app.

AirPrint lets you print wirelessly to AirPrint-enabled printers from the following iOS apps:

>> Mail — email messages and attachments that can be viewed in Quick Look
>> Photos and Camera — photos
>> Safari — webpages, PDFs, and other attachments that can be viewed in Quick Look
>> iBooks — PDFs
>> Maps — the portion of the map showing on the screen
>> Notes — the currently displayed note Other apps available from the App Store may also support AirPrint.

iPhone and the printer must be on the same Wi-Fi network.

How to Troubleshoot AirPrint

Check these things if you are unable to print, or if you see the message "No AirPrint Printers Found."

>> Make sure your printer has paper, and enough ink or toner installed.

>> Make sure your printer is connected to the same Wi-Fi network as your iOS device.

>> Make sure your printer has power and is turned on. Try turning your printer off and then back on again to see if it resolves your issue.

>> Check to see if your printer has any error lights or indicators displayed on the printer's control panel. Check the documentation that came with your printer to clear any errors displayed.

>> Check with your printer's manufacturer to see if any firmware updates are available for your printer. Check your printer's documentation or contact the printer vendor for more information. A firmware update may be available, even if you just bought your printer.

For the complete list of AirPrint compatibility, go to support.apple.com/kb/HT4356.

How to Connect iPhone 6 / iPhone 6 Plus to a TV Using AirPlay or Cable

There are two ways on how to display your iPhone in a TV. It is either using the Airplay with Apple to stream content to an HDTV, or connecting your iPhone directly to your TV using cables.

Using the AirPlay 

By using the AirPlay, you can stream music, photos, and videos wirelessly to your Apple TV and other AirPlay-enabled devices.

You can mirror your iPhone contents to display it on a TV. The controls will automatically appear when an AirPlay enabled device is available on the same Wi-Fi network that your iPhone is connected to.

Stream content to an AirPlay-enabled device: Tap the AirPlay icon. , then choose the device. 

Access the AirPlay and volume controls while using any app: When the screen is on, double-click the Home button and scroll to the left end of the multitasking bar.

Switch playback back to iPhone: Tap the AirPlay icon. , then choose iPhone 

Mirror the iPhone screen on a TV: Tap the AirPlay icon.  at the left end of the multitasking bar, choose an Apple TV, then tap Mirroring. A blue bar appears at the top of the iPhone screen when AirPlay mirroring is turned on. Everything on the iPhone screen appears on the TV. 

Connecting iPhone to a TV using a cable 

Apple cables and adapters (available separately) may be used to connect iPhone to a TV, projector, or other external display. For more information, go to support.apple.com/kb/HT4108.

iPhone 6 Sales is Three Times Better Than iPhone 6 Plus

According to UBS analyst Steven Milunovich, the iPhone 6 sold three times faster than the larger iPhone 6 Plus.

Within 30 days of its release in the U.S. iPhone 6 already at 68% of all iPhone sales while the iPhone 6 Plus is only at 24% or less. Milunovich said in a recent note to the clients.

Every time they made a new model, it will become more popular compared to the previous models according to the research.

Not really sure about this but nearly 1 in 5 Samsung smartphone users are planning to switch to Apple despite of the higher-priced. Plus, iPhone in China is “surprisingly strong,” Milunovich said.

How to Sync iPhone 6 / iPhone 6 Plus With iTunes

Syncing with iTunes copies information from your computer to iPhone, and vice versa. You can sync by connecting iPhone to your computer, or you can set up iTunes to sync wirelessly with Wi-Fi. You can set iTunes to sync music, videos, apps, photos, and more. For help syncing iPhone, open iTunes on your computer, choose Help > iTunes Help, then select Sync your iPod, iPhone, or iPad.

Sync wirelessly. Connect iPhone. Then in iTunes on your computer, select your iPhone, click Summary, and select “Sync with this iPhone over Wi-Fi.”

If Wi-Fi syncing is turned on, iPhone syncs when it’s connected to a power source, both iPhone and your computer are on and connected to the same wireless network, and iTunes is open on your computer.

Tips for syncing with iTunes on your computer 

Connect iPhone to your computer, select it in iTunes, and set options in the different panes.

• In the Summary pane, you can set iTunes to automatically sync iPhone when it’s attached to your computer. To temporarily override this setting, hold down Command and Option (Mac) or Shift and Control (PC) until you see iPhone appear in the iTunes window.

• In the Summary pane, select “Encrypt iPhone backup” if you want to encrypt the information stored on your computer when iTunes makes a backup. Encrypted backups are indicated by a lock icon , and a password is required to restore the backup. If you don’t select this option, other passwords (such as those for mail accounts) aren’t included in the backup and you’ll have to reenter them if you use the backup to restore iPhone.

• In the Info pane, when you sync mail accounts, only the settings are transferred from your computer to iPhone. Changes you make to a mail account on iPhone don’t affect the account on your computer.

• In the Info pane, click Advanced to select options that let you replace the information on iPhone with the information from your computer during the next sync.

• In the Music pane, you can sync music using your playlists.

• In the Photos pane, you can sync photos and videos from a supported app or folder on your computer.

• If you use iCloud to store your contacts, calendars, and bookmarks, don’t also sync them to iPhone using iTunes.

How to Jailbreak Your iPhone 6 and iPhone 6 Plus

It has been awhile since Apple release their new flagship the iPhone 6. I know many of you already thinking on how to Jailbreak your iPhone 6 to extend the features of your iPhone 6. Luckily, Pangu team has released a new utility that will Jailbreak iOS 8.1 on any Apple devices (iPhone or iPads).

Jailbreak Information:

- Untethered
- Includes Cydia
- Pangu 1.1 only runs in Windows
- Mac version is still in progress
- FREE


Jailbreaking your iPhone and iPad devices is very easy by using the Pangu software developed. But there is also a risk, when you jailbreak your device it will void your warranty. I advised that try the jailbreak process when your device is already out of warranty or try your old iPhone and iPad first. Then always perform a backup on your iPhone and iPad specially the important files.

iPhone and iPad devices below are compatible with this Jailbreak software:

   - iPhone 6
   - iPhone 6 Plus
   - iPad Air
   - iPad Air 2
   - iPad Mini Retina
   - iPad Mini Retina 2
   - iPad 3
   - iPad 4 
   - iPod touch 5th gen, running either iOS 8.0 through iOS 8.1.

iPhone 6 and iPhone 6 Plus Tips and Tricks on iOS 8

Connect Your iPhone 6 and iPhone 6 Plus to Wi-Fi

If Wi-Fi icon appears at the top of the screen, you’re connected to a Wi-Fi network. iPhone reconnects anytime you return to the same location.

Configure Wi-Fi. Go to Settings > Wi-Fi.

Choose a network: Tap one of the listed networks and enter the password, if asked.

Ask to join networks: Turn on "Ask to Join Networks" to be prompted when a Wi-Fi network is available. Otherwise, you must manually join a network when a previously used network isn’t available.

Forget a network: Tap "i" icon next to a network you’ve joined before, then tap "Forget this Network."

Join a closed Wi-Fi network: Tap Other, then enter the name of the closed network. You must already know the network name, security type, and password (if required).

Adjust the settings for a Wi-Fi network: Tap "i" icon next to a network. You can set an HTTP proxy, define static network settings, turn on BootP, or renew the settings provided by a DHCP server.

Set up your own Wi-Fi network.

If you have an unconfigured AirPort base station turned on and within range, you can use iPhone to set it up. Go to Settings > Wi-Fi and look for "Set up an AirPort base station." Tap your base station and the Setup Assistant will do the rest.

Manage an AirPort network.

If iPhone is connected to an AirPort base station, go to Settings > Wi-Fi, tap "i" icon next to the network name, then tap "Manage this Network." If you haven’t yet downloaded AirPort Utility, tap OK to open the App Store, then download it.

Connect to the Internet

iPhone connects to the Internet whenever necessary, using a Wi-Fi connection (if available) or your carrier’s cellular network. For information about connecting to a Wi-Fi network, see Connect to Wi-Fi, above.

When an app needs to use the Internet, iPhone does the following, in order:

- Connects over the most recently used available Wi-Fi network
- Shows a list of Wi-Fi networks in range, and connects using the one you choose
- Connects over the cellular data network, if available.

Note: If a Wi-Fi connection to the Internet isn’t available, apps and services may transfer data over your carrier’s cellular network, which may result in additional fees. Contact your carrier for information about your cellular data plan rates.


iPhone 6 and iPhone 6 Plus iCloud Features

iCloud offers free mail, contacts, calendar, and other features that you can set up simply by signing into iCloud with your Apple ID, then making sure that the features you want to use are turned on.

Set up iCloud.

Go to Settings > iCloud. Create an Apple ID if needed, or use your existing one.

iCloud stores your photos and videos, documents, music, calendars, contacts, and more. Content stored in iCloud is pushed wirelessly to your other iOS devices and computers signed into iCloud with the same Apple ID.

iCloud is available on devices with iOS 5 or later, on Mac computers with OS X Lion v10.7.5 or later, and on PCs with the iCloud for Windows 4.0 (Windows 7 or Windows 8 is required).

Note: iCloud may not be available in all areas, and iCloud features may vary by area. For more information, see www.apple.com/icloud.

iCloud features include:

Music, Movies, TV Shows, Apps, and Books:

Automatically get iTunes purchases on all your devices set up with iCloud, or download previous iTunes music and TV show purchases for free, anytime. With an iTunes Match subscription, all your music, including music you’ve imported from CDs or purchased somewhere other than the iTunes Store, can also be stored in iCloud and played on demand. See iCloud and Match.

Photos:

Use iCloud Photo Sharing to share photos and videos with just the people you choose, and let them add photos, videos, and comments. See Photo Sharing.

Family Sharing:

Up to six family members can share their purchases from the iTunes Store, iBooks Store, and App Store. Pay for family purchases with the same credit card and approve kids’ spending right from a parent’s device. Plus, share photos, a family calendar, and more. See Family Sharing.

iCloud Drive:

Safely store your presentations, spreadsheets, PDFs, images, and other documents in iCloud, and access them from your iPhone, iPad, iPod touch, Mac, or PC. See iCloud Drive.

Documents in the Cloud:

For iCloud-enabled apps, keep documents and app data up to date across all your devices set up with iCloud.

Mail, Contacts, Calendars:

Keep your mail, contacts, calendars, notes, and reminders up to date across all your devices.

Safari Tabs:

See the tabs you have open on your other iOS devices and OS X computers.

Backup:

Back up iPhone to iCloud automatically when connected to power and Wi-Fi. All iCloud data and backups sent over the Internet are encrypted. See Backup Files and Settings.

Find My iPhone:

Locate your iPhone on a map, display a message, play a sound, lock the screen, or remotely wipe the data. Find My iPhone includes Activation Lock, which requires your Apple ID and password in order to turn off Find My iPhone or erase your device. Your Apple ID and password are also required before anyone can reactivate your iPhone. See Find My iPhone.

Find My Friends:

Share your location with people who are important to you. Download the free app from the App Store.

iCloud Keychain:

Keep your passwords and credit card information up to date across all your designated devices. See iCloud Keychain. See iCloud Keychain.

With iCloud, you get a free email account and 5 GB of storage for your mail, documents, photos, and backups. Your purchased music, apps, TV shows, and books, as well as your photo streams, don’t count against your available space.

Upgrade your iCloud storage.

Go to Settings > iCloud > Storage, then tap Change Storage Plan. For information about upgrading your iCloud storage, see help.apple.com/icloud.

How to Sync iPhone 6 With iTunes

Syncing with iTunes copies information from your computer to iPhone, and vice versa. You can sync by connecting iPhone to your computer, or you can set up iTunes to sync wirelessly with Wi-Fi. You can set iTunes to sync music, videos, apps, photos, and more. For help syncing iPhone, open iTunes on your computer, choose Help > iTunes Help, then select Sync your iPod, iPhone, or iPad.

Sync wirelessly. Connect iPhone. Then in iTunes on your computer, select your iPhone, click Summary, and select “Sync with this iPhone over Wi-Fi.”

If Wi-Fi syncing is turned on, iPhone syncs when it’s connected to a power source, both iPhone and your computer are on and connected to the same wireless network, and iTunes is open on your computer.

Tips for syncing with iTunes on your computer 

Connect iPhone to your computer, select it in iTunes, and set options in the different panes.

• In the Summary pane, you can set iTunes to automatically sync iPhone when it’s attached to your computer. To temporarily override this setting, hold down Command and Option (Mac) or Shift and Control (PC) until you see iPhone appear in the iTunes window.

• In the Summary pane, select “Encrypt iPhone backup” if you want to encrypt the information stored on your computer when iTunes makes a backup. Encrypted backups are indicated by a lock icon , and a password is required to restore the backup. If you don’t select this option, other passwords (such as those for mail accounts) aren’t included in the backup and you’ll have to reenter them if you use the backup to restore iPhone.

• In the Info pane, when you sync mail accounts, only the settings are transferred from your computer to iPhone. Changes you make to a mail account on iPhone don’t affect the account on your computer.

• In the Info pane, click Advanced to select options that let you replace the information on iPhone with the information from your computer during the next sync.

• In the Music pane, you can sync music using your playlists.

• In the Photos pane, you can sync photos and videos from a supported app or folder on
your computer.

• If you use iCloud to store your contacts, calendars, and bookmarks, don’t also sync them to
iPhone using iTunes.
iPhone iOS 8 iCloud and iTunes Match | iPhone 6 and iPhone 6 Plus Tips

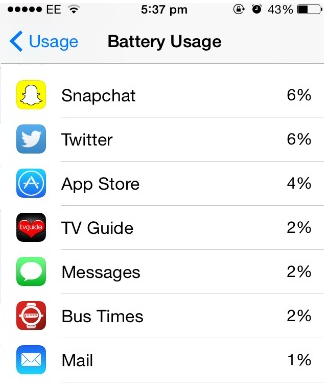
With iCloud, you can access all of the music you purchase in the iTunes Store on all of your devices. The icon shows the songs you have in iCloud. Just click a song to play it.

Automatically download music purchased on another device.

Go to Settings > iTunes & App Store, sign in using your Apple ID, then turn on Music under Automatic Downloads.

Download music if you’re going somewhere you won’t have Wi-Fi.

Click next to the songs you’ll want to play. Or download entire albums and playlists. You can also download previous purchases in the iTunes Store—tap More, tap Purchased, then tap Music.

Remove a song that’s been downloaded.

Swipe left, then tap Delete. The song is removed from iPhone, but remains available from iCloud.

View only music that’s downloaded.

Go to Settings > iTunes & App Store. Under Show All, turn off Music.

With an iTunes Match subscription, you can store all your music in iCloud (up to 25,000 songs)— even songs you imported from CDs.

Note:

iTunes Match may not be available in all areas. See support.apple.com/kb/HT5085.

Subscribe to iTunes Match.

Go to Settings > iTunes & App Store > Subscribe to iTunes Match. See ww.apple.com/itunes/itunes-match.

Turn on iTunes Match.

Go to Settings > iTunes & App Store. Sign in if you haven’t already.

iPhone iOS 8 iCloud Drive | iPhone 6 and iPhone 6 Plus Tips

iCloud Drive stores your presentations, spreadsheets, PDFs, images, and other kinds of documents in iCloud so you can access these documents from any of your devices set up with iCloud. It allows your apps to share documents so you can work on the same file across multiple apps.

iCloud Drive works with devices using iOS 8, Mac computers using OS X Yosemite, PCs with iCloud for Windows 4.0, or through iCloud.com. To access iCloud Drive, you must be signed into iCloud with your Apple ID. iCloud Drive works with supported apps including Pages, Numbers, Keynote, GarageBand, and some third-party apps.

Set up iCloud Drive

You can set up iCloud Drive using Setup Assistant when you install iOS 8, or you can set it up later in Settings. iCloud Drive is an upgrade to Documents and Data. When you upgrade to iCloud Drive, your documents are copied to iCloud Drive and become available on your devices using iCloud Drive. You won’t be able to access the documents stored in iCloud Drive on your other devices until they are also upgraded to iOS 8 or OS X Yosemite. For more information about upgrading to iCloud Drive, see support.apple.com/kb/HT6345.

Set up iCloud Drive.

Go to Settings > iCloud > iCloud Drive, then turn on iCloud Drive and follow the onscreen instructions.

iPhone iOS 8 Backup Files and Settings | iPhone 6 and iPhone 6 Plus Tips

You can use iCloud or iTunes to automatically back up iPhone. If you choose to back up using iCloud, you can’t also use iTunes to automatically back up to your computer, but you can use iTunes to manually back up to your computer. iCloud backs up to iPhone daily over Wi-Fi, when it’s connected to a power source and is locked. The date and time of the last backup is listed at the bottom of the Backup screen.

iCloud backs up your:

- Purchased music, movies, TV shows, apps, and books
- Photos and videos taken with iPhone
- iPhone settings
- App data
- Home screen, folders, and app layout
- Messages (iMessage, SMS, and MMS)
- Ringtones

Note: Purchased content is not backed up in all areas.

Turn on iCloud backups.

Go to Settings > iCloud, then sign in with your Apple ID and password if required. Go to Backup, then turn on iCloud Backup. To turn on backups in iTunes on your computer, go to File > Devices > Back Up.

Back up immediately.

Go to Settings > iCloud > Backup, then tap Back Up Now.

Encrypt your backup.

iCloud backups are encrypted automatically so that your data is protected from unauthorized access both while it’s transmitted to your devices and when it’s stored in iCloud. If you’re using iTunes for your backup, select "Encrypt iPhone backup" in the iTunes Summary pane.

Manage your backups.

Go to Settings > iCloud. You can manage which apps are backed up to iCloud by tapping them on or off. Go to Settings > iCloud > Storage > Manage Storage to remove existing backups and manage iCloud Drive or Documents & Data. In iTunes, remove backups in iTunes Preferences.

View the devices being backed up.
Go to Settings > iCloud > Storage > Manage Storage.

Stop iCloud backups.

Go to Settings > iCloud > Backup, then turn off iCloud Backup.

Music not purchased in iTunes isn’t backed up in iCloud. Use iTunes to back up and restore that content.

Important:

Backups for music, movies, or TV show purchases are not available in all countries. Previous purchases may not be restored if they are no longer in the iTunes Store, App Store, or iBooks Store.

Purchased content, iCloud Photo Sharing, and My Photo Stream content don’t count against your 5 GB of free iCloud storage.

iPhone iOS 8 Find My iPhone | iPhone 6 and iPhone 6 Plus Tips

Find My iPhone can help you locate and secure your iPhone using the free Find My iPhone app (available in the App Store) on another iPhone, iPad, or iPod touch, or using a Mac or PC web browser signed into www.icloud.com/find. Find My iPhone includes Activation Lock, which is designed to prevent anyone else from using your iPhone if you ever lose it. Your Apple ID and password are required to turn off Find My iPhone or to erase and reactivate your iPhone.

Turn on Find My iPhone.

Go to Settings > iCloud > Find My iPhone.

Important: To use Find My iPhone features, Find My iPhone must be turned on before your iPhone is lost. iPhone must be able to connect to the Internet for you to locate and secure the device.

Use Find My iPhone.

Open the Find My iPhone app on an iOS device, or go to www.icloud.com/find on your computer. Sign in and select your device.

Play Sound:

Play a sound at full volume for two minutes, even if the ringer is set to silent.

Lost Mode:

Immediately lock your missing iPhone with a passcode and send it a message displaying a contact number. iPhone also tracks and reports its location, so you can see where it’s been when you check the Find My iPhone app.

Erase iPhone:

Protect your privacy by erasing all the information and media on your iPhone and restoring it to its original factory settings.

Note:

Before selling or giving away your iPhone, you should erase it completely to remove all of your personal data and turn off Find My iPhone to ensure the next owner can activate and use the device normally. Go to Settings > General > Reset > Erase All Content and Settings.

iPhone iOS 8 iCloud Keychain | iPhone 6 and iPhone 6 Plus Tips

iCloud Keychain keeps your Safari website user names and passwords, credit card information, and Wi-Fi network information up to date. iCloud Keychain works on all your approved devices (iOS 7 or later) and Mac computers (OS X Mavericks or later).

iCloud Keychain works with Safari Password Generator and AutoFill. When you’re setting up a new account, Safari Password Generator suggests unique, hard-to-guess passwords. You can use AutoFill to have iPhone enter your user name and password info, making login easy. See Fill in forms on page 64.

Note: Some websites do not support AutoFill.

iCloud Keychain is secured with 256-bit AES encryption during storage and transmission, and cannot be read by Apple.

Set up iCloud Keychain.

Go to Settings > iCloud > Keychain. Turn on iCloud Keychain, then follow the onscreen instructions. If you’ve set up iCloud Keychain on other devices, you need to approve use of iCloud Keychain from one of those devices, or use your iCloud Security Code.

Important: If you forget your iCloud Security Code, you’ll have to start over and set up your iCloud Keychain again.

Set up AutoFill.

Go to Settings > Safari > Passwords & AutoFill. Make sure Names and Passwords, and Credit Cards, are turned on (they’re on by default). To add credit card info, tap Saved Credit Cards.

The security code for your credit card is not saved—you have to enter that manually.

To automatically fill in names, passwords, or credit card info on sites that support it, tap a text field, then tap AutoFill.

To protect your personal information, set a passcode if you turn on iCloud Keychain and AutoFill.

iPhone iOS 8 Family Sharing | iPhone 6 and iPhone 6 Plus Tips

With Family Sharing, up to six family members can share their iTunes Store, iBooks Store, and App Store purchases, a family calendar, and family photos, all without sharing accounts.

One adult in your household—the family organizer—invites family members to join the family group and agrees to pay for any iTunes Store, iBooks Store, and App Store purchases those family members initiate while part of the family group. Once set up, family members get immediate access to each other’s music, movies, TV shows, books, and eligible apps. In addition, family members can easily share photos in a shared family album, add events to a family calendar, share their location with other family members, and even help locate another family member’s missing device.

Children under 13 can participate in Family Sharing, too. As a parent or legal guardian, the family organizer can provide parental consent for a child to have his or her own Apple ID, and create it on the child’s behalf. Once the account is created, it’s added to the family group automatically.

Family Sharing requires you to sign in to iCloud with your Apple ID. You will also be asked to confirm the Apple ID you use for the iTunes Store, iBooks Store, and App Store. It is available on devices with iOS 8, Mac computers with OS X Yosemite, and PCs with iCloud for Windows 4.0. You can be part of only one family group at a time.

Set up Family Sharing.

Go to Settings > iCloud > Set Up Family Sharing. Follow the onscreen instructions to set up Family Sharing as the family organizer, then invite family members to join.

Create an Apple ID for a child.

Tap Settings > iCloud > Family, scroll to the bottom of the screen, then tap Create an Apple ID for a child.

Accept an invitation to Family Sharing.

Make sure you are signed into iCloud, and that you can accept a Family Sharing invitation from your iOS device (iOS 8 required), Mac (OS X Yosemite required), or PC (iCloud for Windows 4.0 required). Or, if the organizer is nearby during the setup process, he or she can simply ask you to enter the Apple ID and password you use for iCloud.

Access shared iTunes Store, iBooks Store, and App Store purchases.

Open iTunes Store, iBooks Store, or App Store, tap Purchased, then choose a family member from the menu that appears.

When a family member makes a purchase, it is billed directly to the family organizer’s account. Once purchased, the item is added to the initiating family member’s account and is shared with the rest of the family. If Family Sharing is ever disabled, each person keeps the items they chose to purchase—even if they were paid for by the family organizer.

Turn on Ask to Buy.

The family organizer can require young family members to request approval for purchases or free downloads. Go to Settings > iCloud > Family, then tap the person’s name.

Note:

Age restrictions for Ask to Buy vary by area. In the United States, the family organizer can enable Ask to Buy for any family member under age 18; for children under age 13, it’s enabled by default.

Hide your iTunes Store, iBooks Store, and App Store purchases.

Open iTunes on your computer, then click iTunes Store. Under Quick Links, click Purchased, then choose the content type (for example, Music or Movies). Hover over the item you want to hide, then click . To make purchases visible again, return to Quick Links, then click Account. Scroll down to iTunes in the Cloud, then click Manage (to the right of Hidden Purchases).

Share photos or videos with family members.

When you set up Family Sharing, a shared album called "Family" is automatically created in the Photos app on all family members’ devices. To share a photo or video with family members, open the Photos app, then view a photo or video or select multiple photos or videos. Tap , tap iCloud Photo Sharing, add comments, then share to your shared family album. See iCloud Photo Sharing.

Add an event to the family calendar.

When you set up Family Sharing, a shared calendar called "Family" is automatically created in the Calendar app on all family members’ devices. To add a family event, open the Calendar app, create an event, then choose to add the event to the family calendar. See Share iCloud calendars.
Set up a family reminder.

When you set up Family Sharing, a shared list is automatically created in the Reminders app on all family members’ devices. To add a reminder to the family list, open the Reminders app, tap the family list, then add a reminder to the list. See Reminders at a glance.

Share your location with family members.

Family members can share their location by tapping Settings > iCloud > Share My Location. To find a family member’s location, use the Find My Friends app (download it for free from the App Store). Or, use the Messages app (iOS 8 required).

Keep track of your family’s devices.

Go to Settings > iCloud > Family, tap your name, then choose to let family members track your devices. To help a family member find his or her device, open the Find My iPhone app. For more information about keeping track of devices, see Find My iPhone.

Leave Family Sharing.

Go to Settings > iCloud > Family, then tap Leave Family Sharing. If you are the organizer, go to Settings > iCloud > Family, tap your name, then tap Stop Family Sharing.

iPhone iOS 8 Photo Sharing | iPhone 6 and iPhone 6 Plus Tips

With iCloud Photo Sharing, you can create albums of photos and videos to share, and subscribe to other people’s shared albums. You can invite others using iCloud Photo Sharing (iOS 6 or later or OS X Mountain Lion or later) to view your albums, and they can leave comments if they wish. If they’re using iOS 7 or OS X Mavericks or later, they can add their own photos and videos. You can also publish your album to a website for anyone to view.

Note:

To use iCloud Photo Sharing, iPhone must be connected to the Internet. iCloud Photo Sharing works over both Wi-Fi and cellular networks. Cellular data charges may apply.

Tap to share with a nearby friend using AirDrop.

Turn on iCloud Photo Sharing.

Go to Settings > iCloud > Photos. Or go to Settings > Photos & Camera.

Share photos and videos.

While viewing a photo or video, or when you’ve selected multiple photos or videos, tap , tap iCloud Photo Sharing, add comments, then share to an existing Shared Album or create a new one. You can invite people to view your shared album using their email address or the mobile phone number they use for Messages.

Enable a public website.

Select the shared album, tap People, then turn on Public Website. Tap Share Link if you want to announce the site.

Add items to a shared album.

View a shared album, tap , select items, then tap Done. You can add a comment, then tap Post.

Delete photos from a shared album.

Select the shared album, tap Select, select the photos or videos you want to delete, then tap . You must be the owner of the shared album, or the owner of the photo.

Delete comments from a shared album.

Select the photo or video that contains the comment. Touch and hold the comment, then tap Delete. You must be the owner of the shared album, or the owner of the comment.

Rename a shared album.

Tap Shared, tap Edit, then tap the name and enter a new one.

Add or remove subscribers, or turn Notifications on or off.

Select the shared album, then tap People.

Subscribe to a shared album.

When you receive an invitation, tap the Shared tab "Cloud icon", then tap Accept. You can also accept an invitation in an email.

Add items to a shared album you subscribed to.

View the shared album, then tap "Plus sign". Select items, then tap Done. You can add a comment, then tap Post.

See your Family album.

When Family Sharing is set up, a shared album called "Family" is automatically created in Photos on all family members’ devices. Everyone in the family can contribute photos, videos, and comments to the album, and be notified whenever something new is added.

How to Connect Your iPhone 6 and iPhone 6 Plus to Wi-Fi

Configure Wi-Fi. Go to Settings > Wi-Fi.

Choose a network: Tap one of the listed networks and enter the password, if asked.

Ask to join networks: Turn on "Ask to Join Networks" to be prompted when a Wi-Fi network is available. Otherwise, you must manually join a network when a previously used network isn’t available.

Forget a network: Tap "i" icon next to a network you’ve joined before, then tap "Forget this Network."

Join a closed Wi-Fi network: Tap Other, then enter the name of the closed network. You must already know the network name, security type, and password (if required).

Adjust the settings for a Wi-Fi network: Tap "i" icon next to a network. You can set an HTTP proxy, define static network settings, turn on BootP, or renew the settings provided by a DHCP server.

Set up your own Wi-Fi network.

If you have an unconfigured AirPort base station turned on and within range, you can use iPhone to set it up. Go to Settings > Wi-Fi and look for "Set up an AirPort base station." Tap your base station and the Setup Assistant will do the rest.

Manage an AirPort network.

If iPhone is connected to an AirPort base station, go to Settings > Wi-Fi, tap "i" icon next to the network name, then tap "Manage this Network." If you haven’t yet downloaded AirPort Utility, tap OK to open the App Store, then download it.

Connect to the Internet

iPhone connects to the Internet whenever necessary, using a Wi-Fi connection (if available) or your carrier’s cellular network. For information about connecting to a Wi-Fi network, see Connect to Wi-Fi, above.

When an app needs to use the Internet, iPhone does the following, in order:

- Connects over the most recently used available Wi-Fi network
- Shows a list of Wi-Fi networks in range, and connects using the one you choose
- Connects over the cellular data network, if available.

Note:

If a Wi-Fi connection to the Internet isn’t available, apps and services may transfer data over your carrier’s cellular network, which may result in additional fees. Contact your carrier for information about your cellular data plan rates.

iPhone 6 Tips and Tricks

How to Factory Reset (Hard Reset) iPhone 6

Restoring the default settings or factory reset your iPhone 6 will delete all your saved files. It is recommended to backup your important files on your computer before attempting to reset your device.

We have our own reasons why we factory reset our device. Maybe we want to delete all the files and restore the device to its original state. It could also be the device may be malfunctioning or so slow and it needs to be reset.

The steps below are the instructions on how to factory reset your iPhone 6:

Step 1. On your iPhone, go to "Settings".

Step 2. Select "General" option.

Step 3. On the bottom of the screen, tap "Reset".

Step 4. You will be seeing a list of things which you can reset. If you want to reset all the content, select "Erase All Content and Settings".

Step 5. Tap "Yes" to confirm the action.

Now, you just need to wait while your iPhone 6 is wiping all datas or files on your device. In a short while your device will be good as new.

It is also recommended to Restart or reset your iPhone 6 first if something wrong before attempting to factory reset. This will also force your apps to quit.

Restart iPhone. Hold down the Sleep/Wake button until the red slider appears. Slide your finger across the slider to turn off iPhone. To turn iPhone back on, hold down the Sleep/Wake button until the Apple logo appears.

Force an app to quit. From the Home screen, double-click the Home button and swipe upwards on the app screen.

If you can’t turn off iPhone or if the problem continues, you may need to reset iPhone. Do this
only if you’re unable to restart your iPhone.

Reset iPhone. Hold down the Sleep/Wake button and the Home button at the same time for at least ten seconds, until the Apple logo appears.

You can reset the word dictionary, network settings, home screen layout, and location warnings. You can also erase all of your content and settings.


How to Import Contacts From Old Phone to New Phone (on Sony, iPhone, Samsung, HTC and Nokia)

Contacts is very important for everyone of us. We can't connect to our friends without a contact number. If you have a new phone, saving contacts on the phone one by one is so hassle. But now, there's an easy way how to transfer or import your contacts from your old phone to your new phone.

Use your PC to transfer contacts to your new phone. This process is applicable in several phone brands, including Sony, iPhone, Samsung, HTC and Nokia.

You just need an Internet Connection on your PC, your old and new phone and their own USB cable.

Then you need to install the PC Companion program. This is a free application and the installation files are already saved on your new phone. This program can also be used in updating your phone software.

Please note that if you are using the Microsoft Windows 7 operating system on your PC, make sure that the AutoPlay setting is enabled.

To check your settings:

Click Start > Control Panel, then type "autoplay" on the search box. Click the AutoPlay, and mark the check box Use AutoPlay for all media and devices.

Installing the PC Companion:

  • Turn on your new Phone and connect it to your PC.
  • On your new Phone, tap "Install" to install PC Companion on the PC.
  • On your computer, if a pop-up window that appears notifies you about available PC Software, select Run Startme.exe.
  • Then click Install to start the installation and then follow the instructions to complete the installation.

If you are not prompted with a pop-up window to install the PC Companion, you can also download the PC Companion here.

Transferring your contacts to your new phone:

  • Make sure that PC Companion is installed on your PC.
  • Open the PC Companion application on your PC.
  • Then click Contacts Setup and follow the instructions to transfer your contacts.


How to Import Movies on iPhone 6

Bored? Want to watch movies on your iPhone but don't know how to import it. Well, no worries. Here's a very simple steps on how to import movies from your PC to your iPhone.

Step 1. Use the USB cable and plug your iPhone into your computer. iTunes should automatically open.

Step 2. Click the "Movies" tab in the center of the iTunes browser window.

Step 3. Check the boxes next to the movies you want to sync, or you can select "Automatically include (all) movies." 

Step 4. Click the "All" box to bring up a drop-down menu, then select the option of your choice. 

Step 5. Select "Move" next to any rented movies.

Step 6. Click "Apply" in the bottom-right corner of the window.


How to Save Battery Life on your iPhone 6

If you just got your new iPhone 6, you’d never want to leave it sitting blankly for even an hour. You’d even want to use it till its battery gone dead. It’s common for Apple users to get fascinated and hooked with iDevices’ cool features. If you are that addicted, saving your battery life could perhaps give you another hour of gaming spree and even lengthen your devices’ life. Here are some few things though that you must know on how to save battery life on your iDevices.

1. Turn off vibrate feature when playing games. Avoid playing intensive video games as this will kill your battery quickly.

2. You might not know this, but by adjusting your devices’ volume to low or none at all, you are eventually saving a small amount of battery life. Go to Settings menu, select General and head on to Sounds to adjust your devices’ sound system.

3. Just like computers, keeping your iDevices’ screen at maximum brightness will consume more battery life. Adjust your screen settings to low by going to Settings and select Brightness and Wallpaper to change the default level of brightness.

4. Switch to Airplane mode when you don’t need to use the internet. Airplane mode basically turns off both Wi-Fi and the regular wireless radio. However this will also prevent calls from coming in. If you’re just playing a regular game and doesn’t want any disturbances (like a phone call perhaps), might as well switch to Airplane mode to save battery life.

5. 3G connection uses up more battery life compared to Wi-Fi. So if possible, use Wi-Fi especially on hotspot instead of 3G. According to Apple, iPhone on the other hand gets 10 hours for Wi-Fi and only 6 hours for 3G.

6. Disable Bluetooth radio when not needed. Go to Settings, then General and Bluetooth to switch off.

7. Turn off Push Notifications. Every time you get notifications from Facebook , Twitter or any apps your using, you’re also consuming your battery life. If you can check those apps manually, you can turn off the notifications by heading to SettingsNotifications and switch to off to save a bit of battery life.

8. Set your screens to lock quickly when not in use. Go to General; select Auto-Lock to set your screen to lock quickly before you put it back on your pocket or bag.

9. Keep your devices out of the sun or any hot surfaces. Heat kills batteries quickly.


How to Invert Screen Color on iPhone 6

iPhone 6 is dubbed to have a perfect fit on your hand compared to other smartphones in the market. The phone is slimmer, even lighter and has a higher-resolution compared to its predecessors. This 4-inch smartphone allows you to change its screen/menu colors for a customize phone and of course for easy viewing. Check out these easy and simple steps and try it yourself.

1. On your iPhone 6, press on Settings icon.

2. Then go to General.

3. On the list, scroll down to Accessibility.

4. And then switch to turn on the Invert Colors option. That’s how you change your screen color for easy viewing.


How to Turn On/Off WiFi on iPhone 6 | Forget a Network

With its sleek and stunning features, iPhone 6 is surely one of the best of its kind. Apple has finally connected iPhone to the fastest cellular data network called the LTE. Uploads, data download, internet browsing is faster than you think even when it’s not on WiFi connection. Nevertheless, here are few steps on how you can turn on/off your wifi settings on your mighty iPhone 6.

1. On your iPhone 6 device, press on the Settings icon.

2. Select on WiFi on the menu options.

3. Now there’s a switch button on top of your screen. If you click on that, it’ll turn on the Wifi Settings in blue color. Press the same button to turn off WiFi.

4. Take note that when you turn on your WiFi settings, it will search for available networks in the local area.

Choose a network: Tap one of the listed networks and enter the password, if asked.

• Ask to join networks: Turn on “Ask to Join Networks” to be prompted when a Wi-Fi network is available. Otherwise, you must manually join a network when a previously used network isn’t available.

• Forget a network: Tap 'i' icon next to a network you’ve joined before. Then tap “Forget this Network.”

• Join a closed Wi-Fi network: Tap Other, then enter the name of the closed network. You must already know the network name, security type, and password (if required).

• Adjust the settings for a Wi-Fi network: Tap 'i' icon next to a network. You can set an HTTP proxy, define static network settings, turn on BootP, or renew the settings provided by a DHCP server.

iPhone 6 User Manual for iOS 8 PDF FREE Download

iPhone 6 Specifications

Category: Apple Smartphone
Officially Announced: September 2014 Official
Released: Expected on September 2014
Market Status: Soon
Price: US $199 16GB | US $299 16GB | US $399 16GB
Weight: 129g Screen
Display: 4.7" LED-backlit IPS LCD, capacitive touchscreen, 16M colors
Camera: 8MP
Connections: Bluetooth 4.0, Wi-Fi

iPhone 6 User Manual for iOS 8 PDF FREE Download

How to Turn On/Off WiFi Connection on iPhone 6

You sure you want to connect your iPhone 6 to available WiFi hotspot. In today's time, there are already a lot of WiFi connection where you can connect for free. Specially when you are shopping in mall, eating in a restaurant, and many more. So, here are few steps on how you can turn on/off your WiFi settings on your iPhone 6.

How to Import Movies on iPhone 6


If you are not familiar in importing files like movies on your iPhone 6, then you will learn it today. I know how people love to watch movies on their iPhone 6, but really know on how to transfer the file from their computer. Here's a very simple steps on how to import movies from your PC to your iPhone 6.

How to Save Battery Life on iPhone 6


Here's a few advice on how you can save your battery life on iPhone 6. I know you’d never want to leave it sitting blankly for even an hour. You’d even want to use it till its battery gone dead. It’s common for Apple users to get fascinated and hooked with iDevices’ cool features. If you are that addicted, saving your battery life could perhaps give you another hour of gaming spree and even lengthen your devices’ life.

Follow these few things on the list and I am sure that you will use your iPhone 6 in longer time.

iPhone 6 User Manual PDF Free Download

iPhone 6 user manual will be available for download once it will be out in the market. The link below where you can download the User Manual will be updated soon. The link will redirect you to the PDF File of iPhone User Guide for iOS 7.1 Software. There also also rumors that Apple will also update their iOS version to iOS 8 Software. Definitely will create a new PDF File for the iOS 8 software version.

You can download the User Manual PDF of iPhone 6 on the link below once it will be out in the market with the new iOS 8. Stay tune for more updates.

>>> Free Download User Manual PDF of iPhone 6.

iPhone 6 Release Date and Specs


What we expect on iPhone 6? Many people believe that the iPhone 6 would be the most anticipated smartphone ever this 2014, this is according to a survey of 4000+ US consumers. Why do they think so? Other competitor like Samsung, Sony and HTC already released their new flagship this 2014. I am pretty sure that Apple is preparing for a big surprise to surpass each competitor. 

As analysts believe that there is a big possibility that Apple will release there new flagship this Fall. Which will be on the month of September with two versions of iPhone 6

How to Factory Reset (Hard Reset) iPhone 6


iPhone series only have the same way on how to factory reset and hard reset your device. Here's a very simple steps on how to factory reset your iPhone 6:

Step 1. On your iPhone, go to "Settings".

Step 2. Select "General" option.

iPhone 6 Release on September With Two Versions


According to the recent reports, Apple will released two versions of iPhone 6 probably this coming September. As the company's track record, major product releases always happen around fall. The iPhone 5 series came out last September 2012. And the new version iPhone 5s and iPhone 5c came out around the same time last year. So many analysts believe that Apple will be releasing its new flagship on this timeline soon.